
Drawing O-rings for dad aka printing O-rings for dad part 2
Practicalities…
While waiting for my Sainsmart 3D TPU filament to arrive, I still needed some other parts before I could start the printing. That is a CAD drawing of such O-ring. I thought I would finish this in a couple of minutes, I mean how hard could it be? I simply draw a ring and that’s it. Always, in practice or in reality if you want, it does not come easy. At least if you are unexperienced, things you know how to, well… you know how to. Therefore they are easy :).
O-ring or square-ring?
First I started with two circles, and then you would extrude it up a little to get a 3D part. Circles are 2D as they “live” in a plane. If you could pull it up well then you would end up with a sort of squished cylinder and it becomes 3D! Something like below. But then I realized in my situation I would prefer not to have 2 “flat” sides. Which ends up to be more of a square ring. 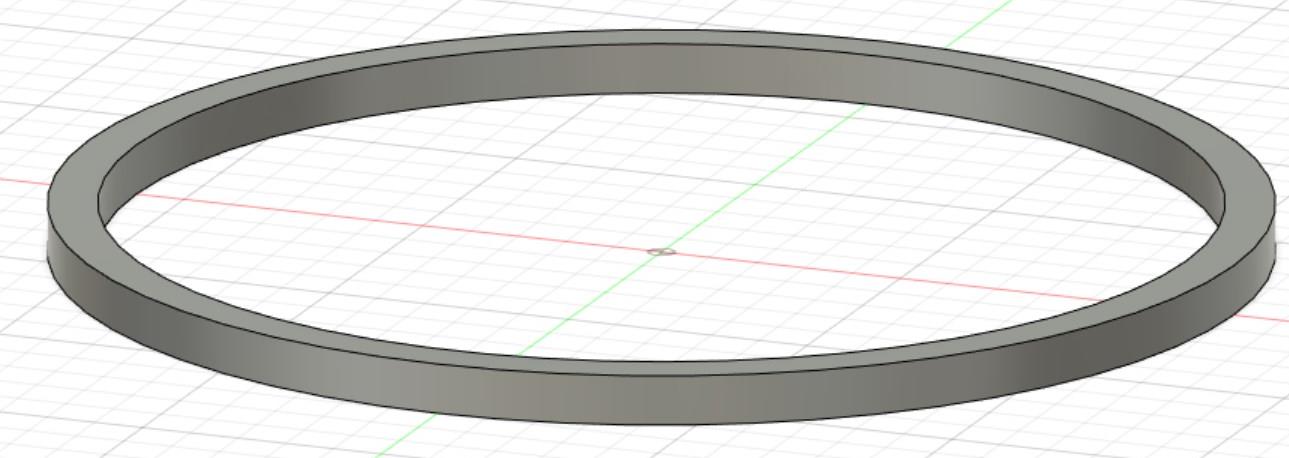
To mimic a real O-ring both sides would’ve have been well round and like a circle, but this is unpractical for a 3D-printer. Since it prints on a flat surface, one side eventually ends up flat. Therefore, it would be stupid to draw it round. Well you could try, but that would mean the following printed layers have to “fly”. This is called overhang and while it allows for some I might as well just draw it flat as in my use case it would be perfectly fine.
The previous method was not what I wanted exactly, as I end up with 2 flat surfaces, well my next method was to draw a circle and cut it in half, let this rotate over an axis that such far away it is equal to the inner radius I want ~4.5cm. So I start of drawing a circle in the origin…. This was a bad plan. Somehow I could not move it, well because fusion fixes/constraints it to the origin. After some googling I found this out, and it was suggested to remove this constraint, however trying to do this didn’t help. I gave up and just drew another circle but not taking the origin at the center of the circle. I ended up with something that looked quite decent.
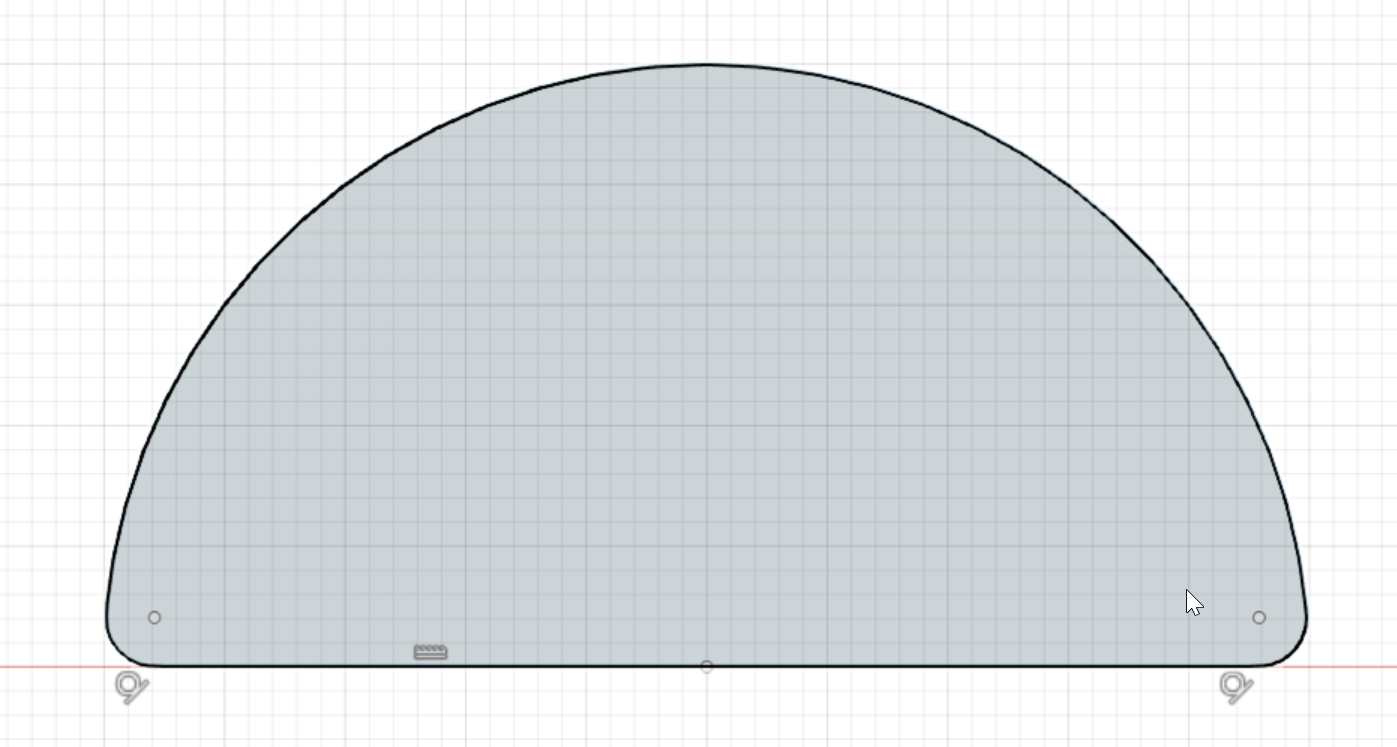
Oh I also added some fillets, what are those? Well those nice roundings, at the left and right corner. Ah remember what I said about not being able to print flying things? Yeah maybe the overhang angle is a bit too aggressive. Also maybe I want it to be a bit thicker, lets add a square to the bottom. Here we go.

Now we move it away from the origin ~4.5 cm and revolve and we end up with something that is looking promising.

What now?
Well I exported the file as a STL, next I will set the Cura profile and slice it and test both “O-ring” designs. The one with fillets and one with a square. Also I designed the width of the O-ring to be 5 mm, from the CAD program it seems to be a bit too wide. I just randomly chose this as it seemed to be quite okay. But I might redesign it for 4 mm, or smaller. As I am a real fusion360 noob, I do not know how to make it parametric. That means I tell the program, that the things I draw can be varied, and just changing this number somewhere in the program which I do not know yet. I can easily adjust various dimensions of the object. Some important parameters here would be: inner diameter, width and height. That is the next thing to learn.
PS
Oh since probably nobody reads this blog yet, I am not going to bother yet/I do not know how I am going to implement this. But these files can be made available, for now just shoot me a mail!
Comments