
ShiBee stick flashing and teardown
To make or not to make a shtick
A recent design of a ZigBee stick
As mentioned before, I had issues with my old ZigBee stick. Also due to low inventory, because of shortages of the new ZigBee TI CC2652 USB sticks, I took upon myself to design my own. It was a nice pet project because I also wanted to learn Altium designer, while before this I always worked with autodesk EAGLE. The design of this stick is something I also want to share but will be for later.
Okay I have one, what now?
So the ShiBee stick comes ready with the firmware already flashed on there. Depending on your needs you might want to flash a newer version or the router firmware. Due to the great support of the community several guides are floating around. However, for good practice that only I can promise a how-to guide can stay available, I will repeat the steps here.
Flashing of the ShiBee stick
-
Install python
-
Open your python terminal
-
python --versioncheck whether it displays >=3.4 -
pip install pyserial intelhexdependencies -
Download the firmware (coordinator or router) with “CC1352”, please select the “other” version as it will make sure the LEDs work. The filename is
FIRMWARE. The script that will be used in python can be downloaded from here. -
Open device manager if on windows or use
lsusband find what name =PORTyour computer gave your CH340 usb device.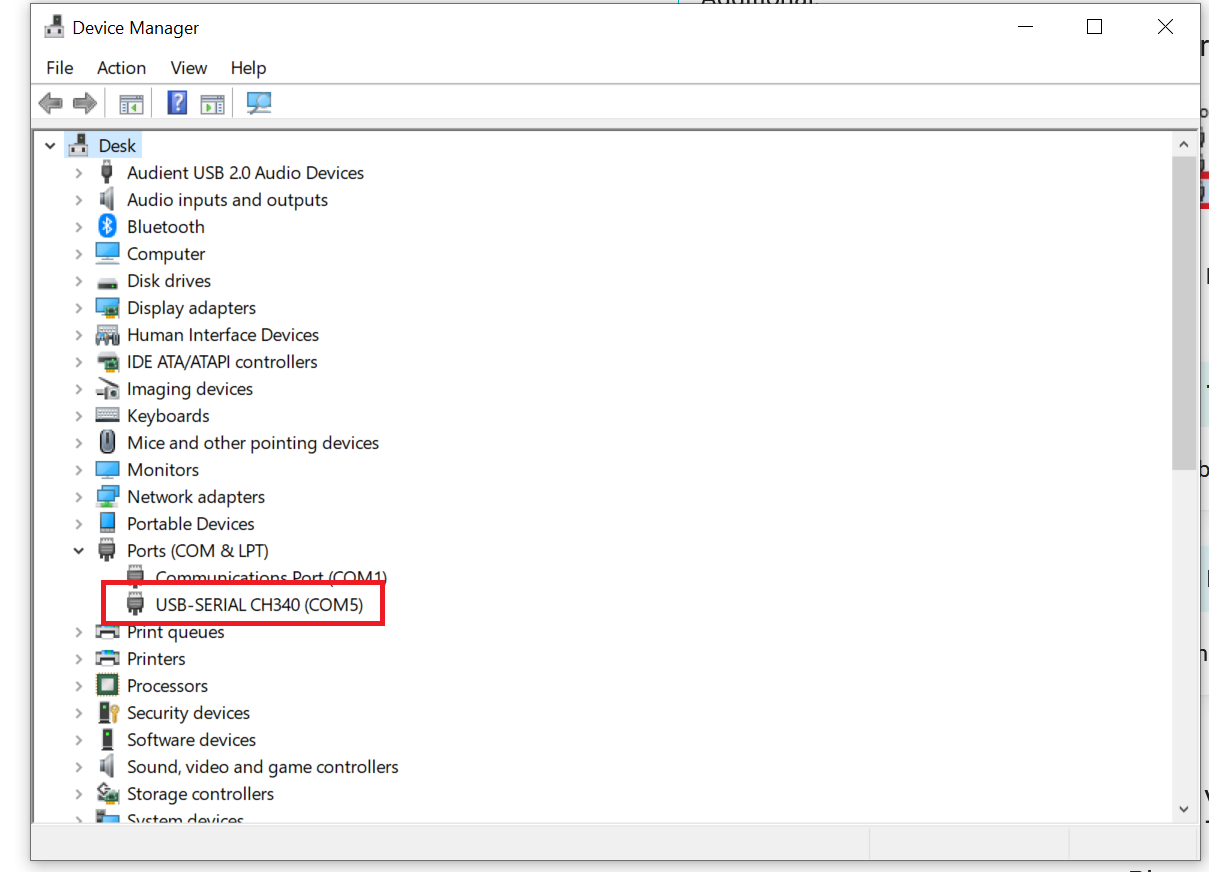
-
python cc2538-bsl.py -p PORT -evw FIRMWAREIn my casePORTisCOM5and my file is renamed toflash_me_router.zip. Hence it can look something like this: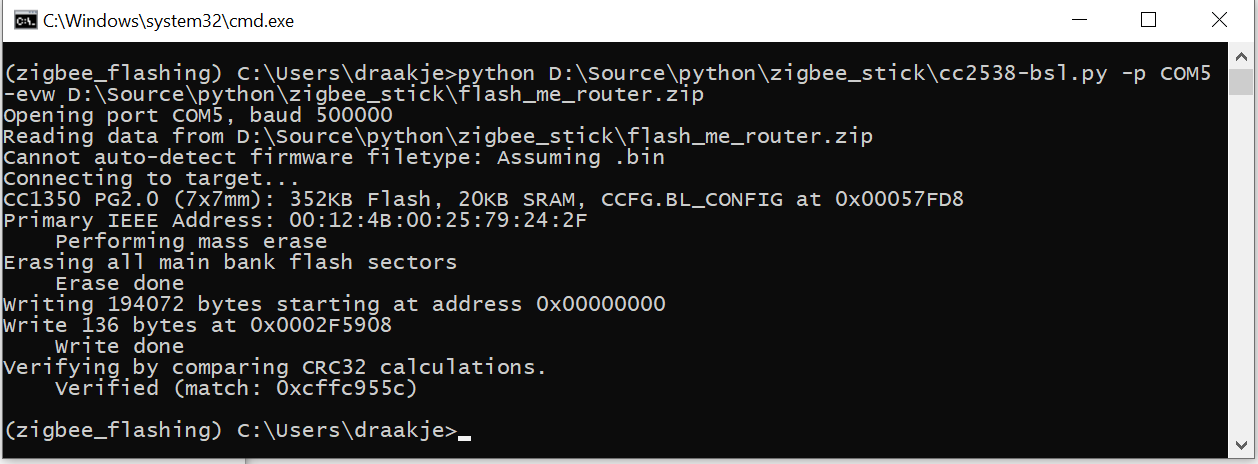
-
You have flashed your device, congratz!
Erasing of the ShiBee stick
Sometimes you just want an empty stick in that case just run.
python cc2538-bsl.py -p PORT -e
Clearing NVRAM of the ShiBee stick
Due to the certain procedures in the script some garbage might prevent you from restoring from the coordinator’s memory (NVRAM). To prevent this you can use the script available from your zigbee2mqtt installation.
- Locate in the zigbee2mqtt folder under
.../scripts, which typically is/opt/zigbee2mqtt/scriptsthezStackEraseAllNvMem.jsscript. node zStackEraseAllNvMem.js /dev/ttyUSB0Will clear the NVRAM, note that ttUSB0 is typically the name it gets in Linux OS’s such as Raspbian for raspberry pi.
Tearing down the EBYTE E72 2G4M20S1E
The main ‘sub’-component of the board is EBYTE module which houses all the necessary components for the CC2652 chip. However it is covered with a metal shield as you can see. 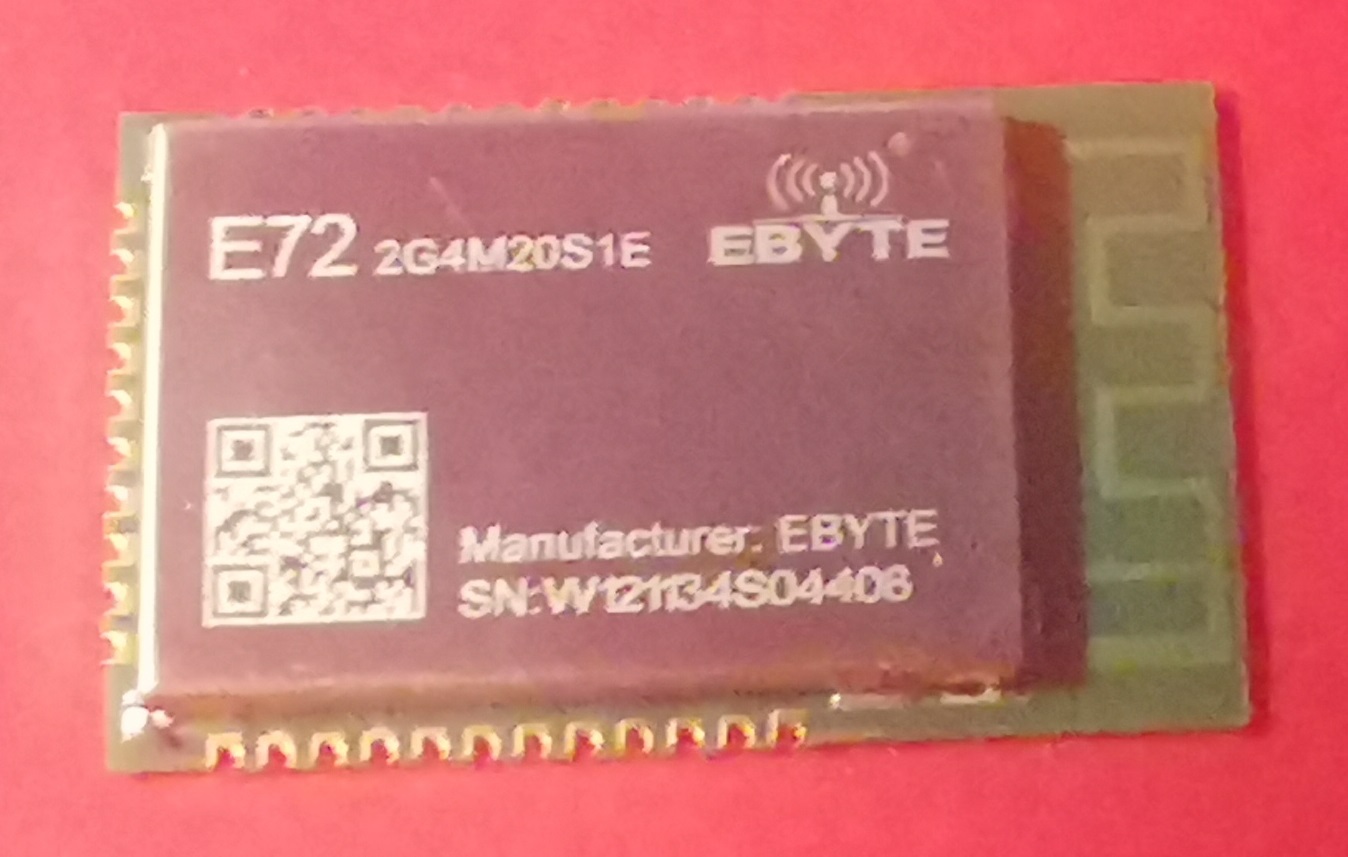
This is done to prevent the antenna’s electromagnetic waves from interfering with the components on the EBYTE module. To open it up I took my hot air gun and removed it with a bit of heat. Then we are shown with the following:
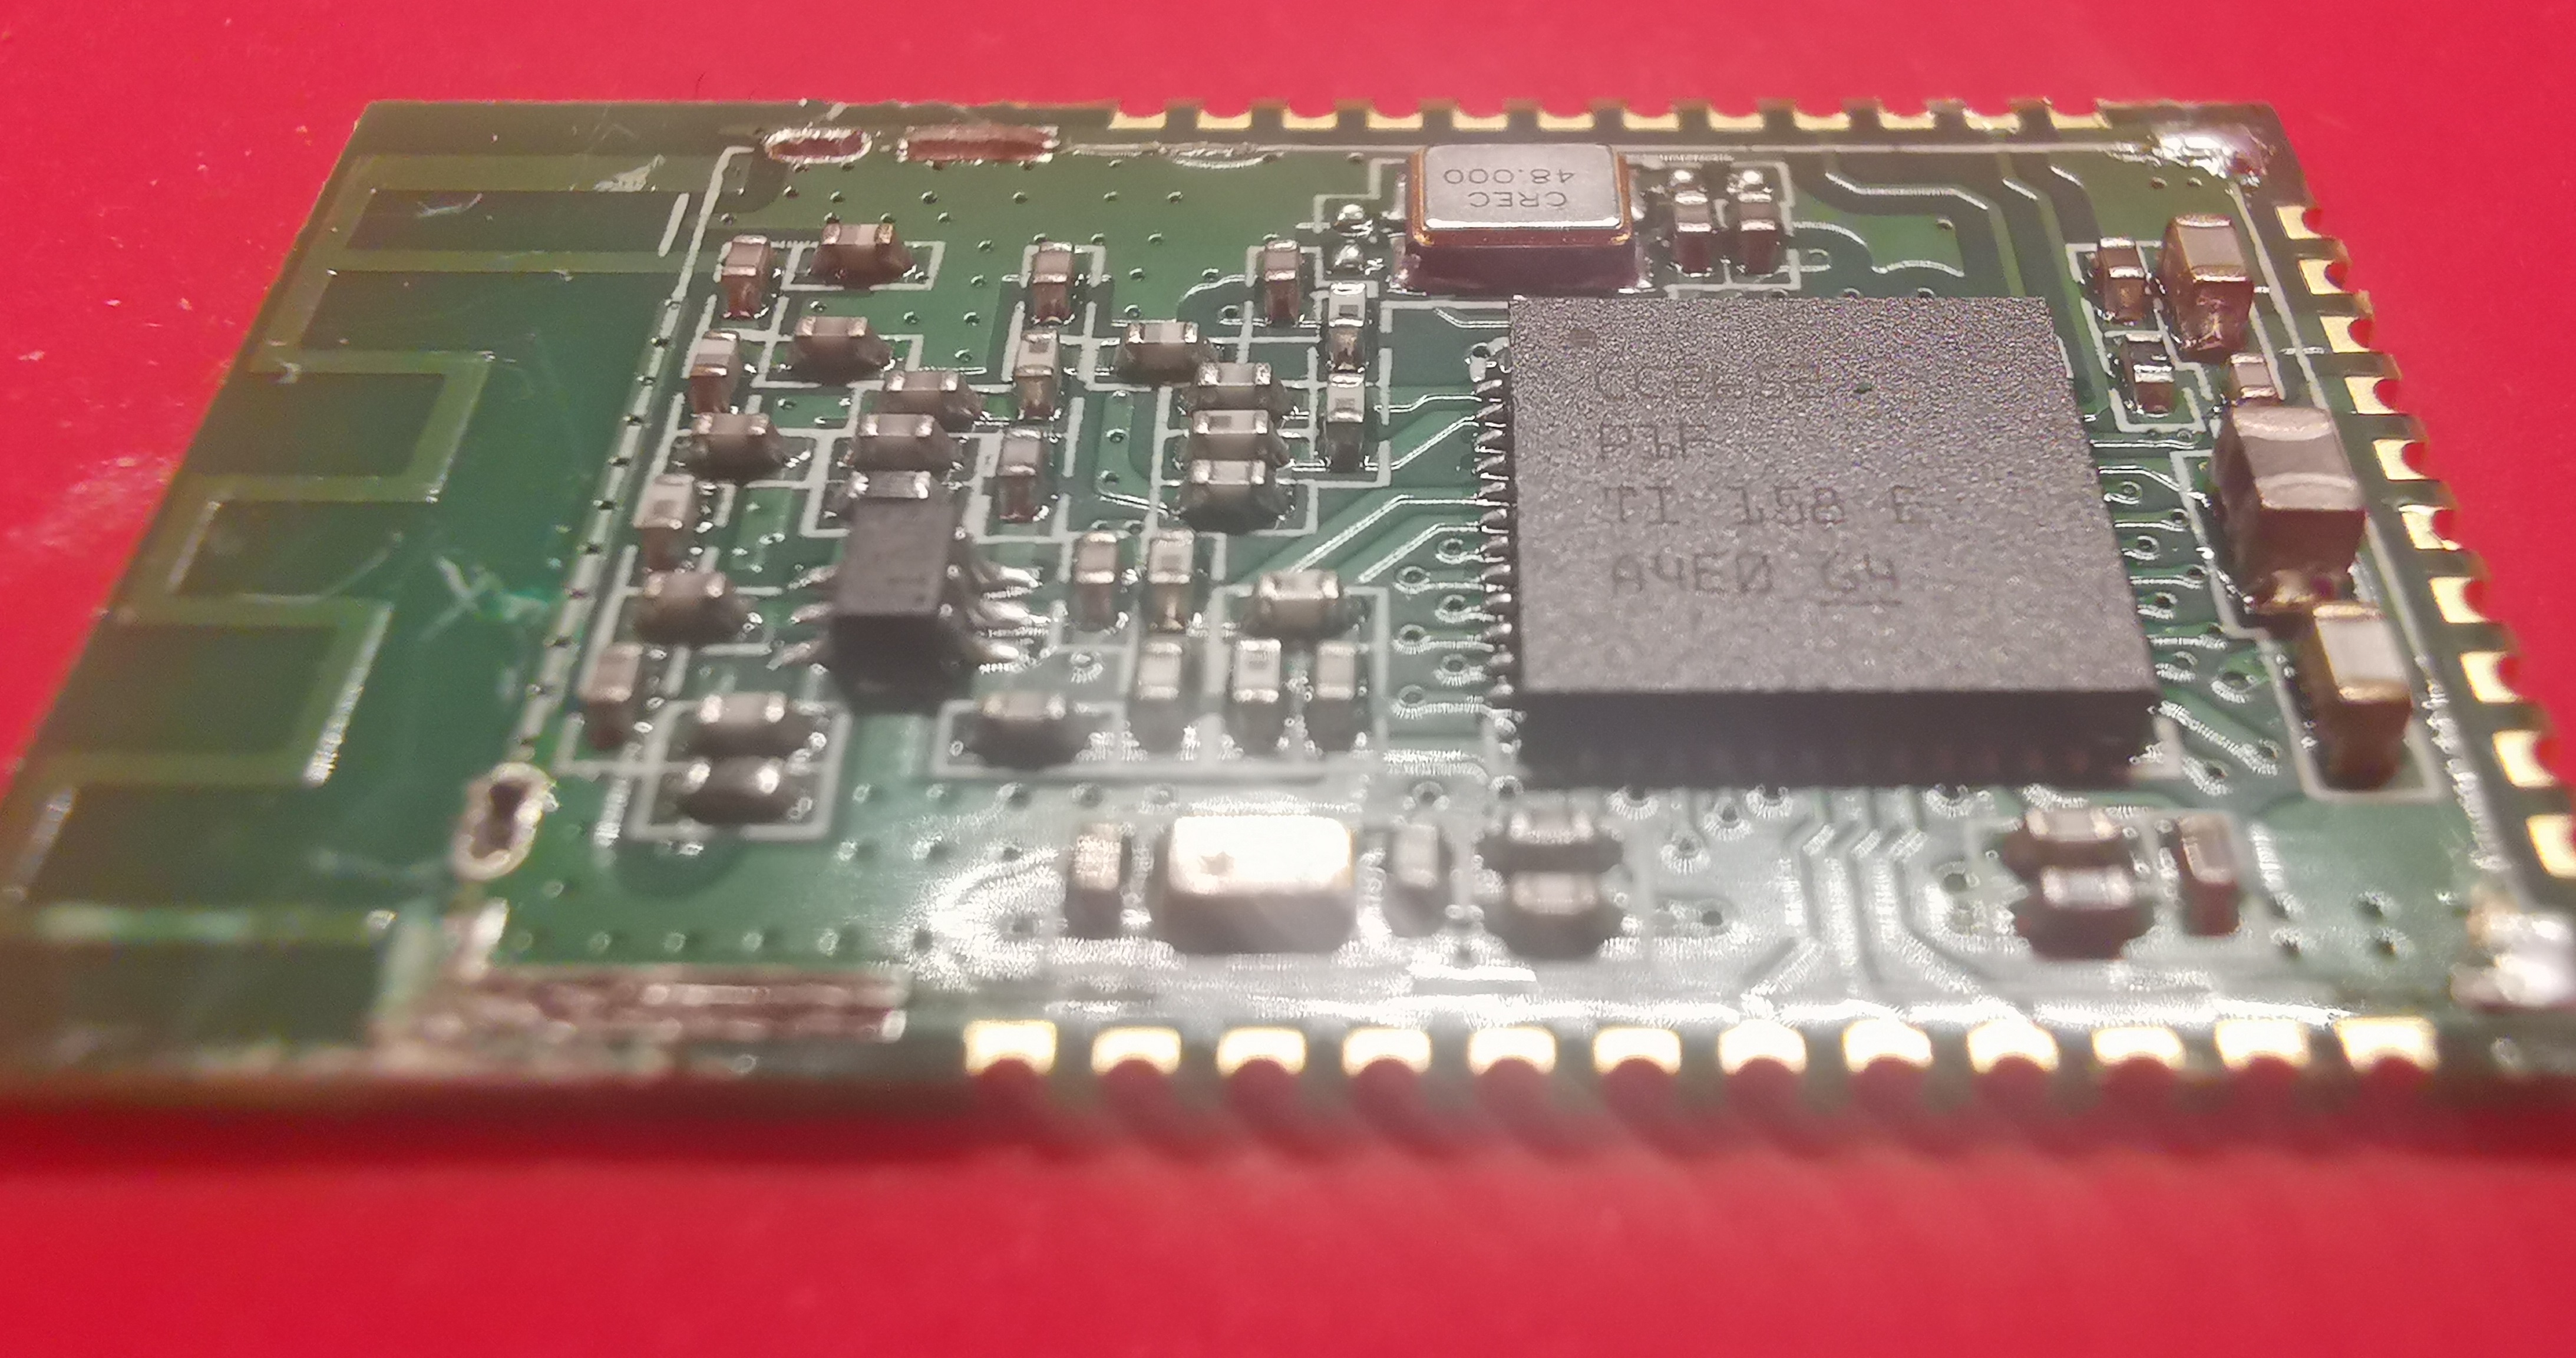
I have to say the PCB looks pretty good and the soldering also. I would like to reverse-engineer some small sub-circuits just for curiosity, however I unfortunately do not have a microscope. So I will let this rest. Overall I am quite positive over the module’s quality what I can see by eye. Also the virtual render they had on their website is actually pretty close how it looks in real, which is a + for me as I dislike marketing trickery. See below (taken from)

Comments